

Create a form
A form is created as an .hf file in the file system. See Forms for the
difference between the two editors and for the role of launch points.
-
Open the file system of the office or project.
-
Click the New icon (a blank sheet) in the toolbar and choose the editor:
- New form (simple editor): fields are added one at a time and stacked one below the other;
- New form (advanced editor): components can be placed freely, side by side or in different layouts. Before it opens, the editor asks for a starting structure (Empty model, Vertical form, Inline form or Checklist form), which can be changed later.
-
Open the form’s general information:
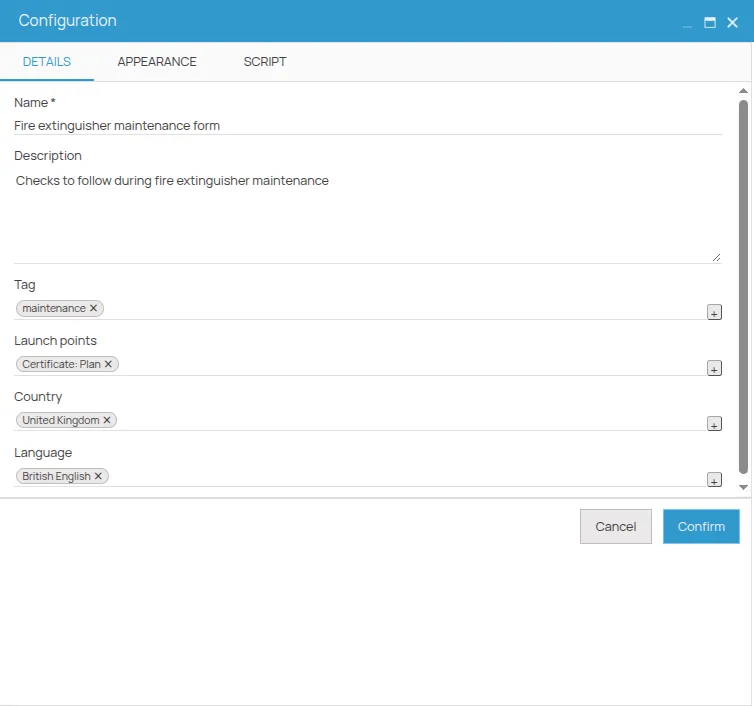
- in the simple editor, click the Configuration icon (a gear): the Details tab opens;
- in the advanced editor, open the Tree tab and select the Form item, the first in the tree: the information is in the General section of the properties panel. If another item is selected, the panel shows the properties of that item.
-
Enter the information:
- Name, required: the name the form is listed under in Fill in a form. The simple editor starts with No name, to be replaced;
- Description, optional;
- Tag, optional: in Fill in a form tags can be used to filter the list;
- Launch points: the items on which the form will be offered;
- Country and Language: used by the filters in Fill in a form. If they are left on All countries and All languages, the form appears whatever the filter.
-
Build the content of the form. See Build a form with the simple editor or Build a form with the advanced editor.
-
Click the Save icon (a floppy disk) and choose Save as. Enter the file name and pick the folder: the dialog suggests the one open in the file system, but any other can be chosen.
From now on Fill in a form offers the form on every item that matches its launch points. To fill it in, see Fill in a form.
Edit a form
Section titled “Edit a form”- In the file system, select the form’s
.hffile. - Click the Modify icon (a pencil) in the toolbar, or right-click the file and choose Modify. The form opens in the editor it was created with.
- Make your changes, then click the Save icon (a floppy disk) and choose Save to overwrite the file, or Save as to create a copy.
Changes apply to later completions: forms already filled in stay as they were.
This site is protected by reCAPTCHA and the Google Privacy Policy and Terms of Service apply.