

Build a form with the advanced editor
The advanced editor builds a form by placing components in a work area. Among other things, fields can be placed side by side, arranged in different layouts and duplicated. See Forms for how it differs from the simple editor, and Create a form to open the editor, set the launch points and save.
Build the form
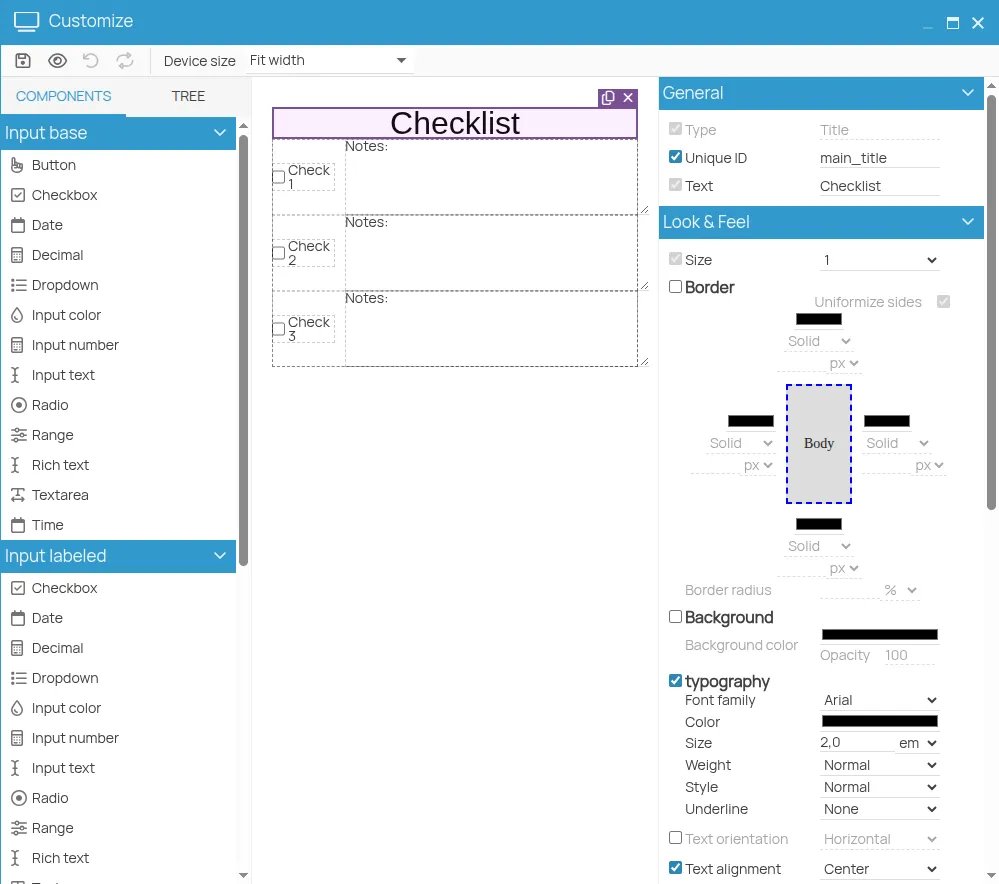
Section titled “Build the form”- Add a component from the Components panel on the left:
- drag it onto the preview in the centre and drop it where it should appear;
- or click it: it is added after the selected item, inside the selected layout or, if nothing is selected, at the end of the form.
- Select the item by clicking it in the preview or in the Tree tab. The panel on the right shows its properties: text, size, margins, default value and others, depending on the component. See The advanced editor panels.
- Two icons appear on the selected item: one duplicates it, the other deletes it.
- To place fields side by side or build a table, first add a layout component, then the fields inside it. See Layouts.
- Check the result with the Preview icon in the toolbar. The Undo and Redo icons step back and forward through your changes.
- Save the form.
Add a script to a form
Section titled “Add a script to a form”Select the Form item, the first in the Tree tab, and open the Input section of the properties panel: the script is written in the Event Map field.
A script is JavaScript code that the form runs while it is being filled in. It can, for example, prefill a field with data from the item the form was opened from, as the attendance register does with the list of participants. How to write a script is explained in Add a script to a form.
This site is protected by reCAPTCHA and the Google Privacy Policy and Terms of Service apply.