Approvals: Supplier Guide
The Approvals system is a feature designed to ensure maximum control over certifications and documents submitted by parties external to the project.
In 4HSE, a supplier may be assigned a Procedure by the project manager, for example to carry out a technical activity, perform maintenance, or produce specific documentation.
Once the required activity has been completed, the supplier must issue the related certificate, associating it with the assigned Action. Issuing the certificate does not immediately validate the Action: the system automatically starts an approval process, submitting the certificate for review by a project manager (Admin or Manager). The Action will change to Valid status only if the outcome is positive.
Issuing the Certificate and Submitting an Approval Request
Section titled “Issuing the Certificate and Submitting an Approval Request”To create an approval request, the supplier must access their supplier profile from the Suppliers list (Desktop icon). Once inside the profile, they can issue the certificate and automatically send the approval request to the project manager.
There are three main scenarios for submitting a request:
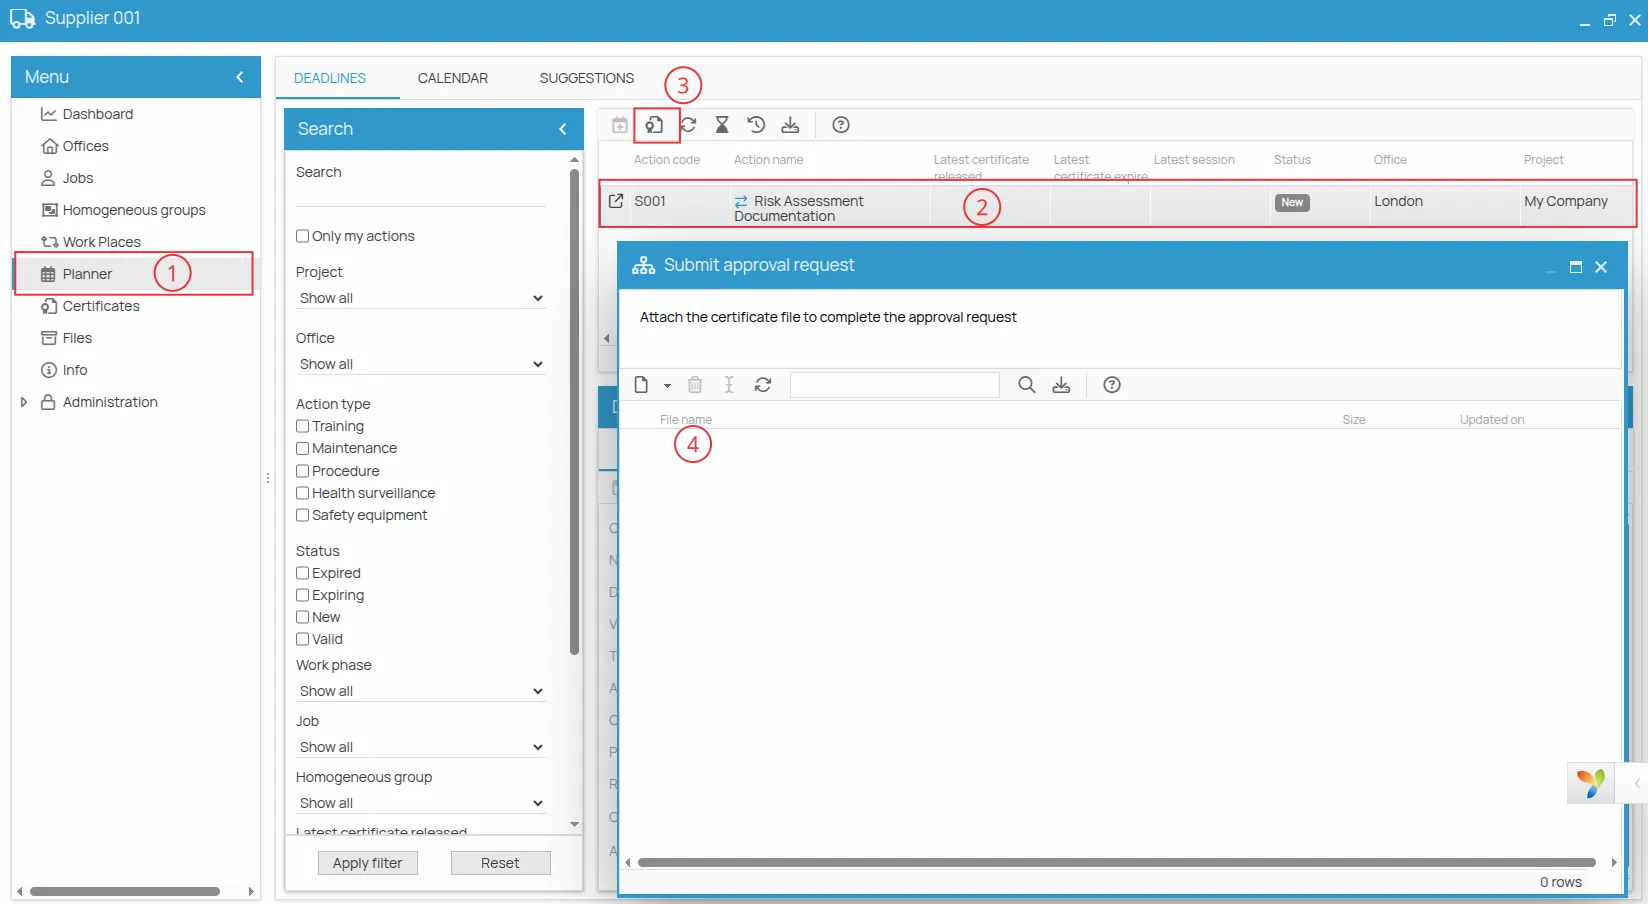
1. Certificate from the Supplier’s Schedule
Section titled “1. Certificate from the Supplier’s Schedule”- The supplier selects a certificate directly from their schedule;
- The association with the Action is automatic;
- The system immediately generates the approval request;
- Uploading the certificate file is required to complete the approval request.
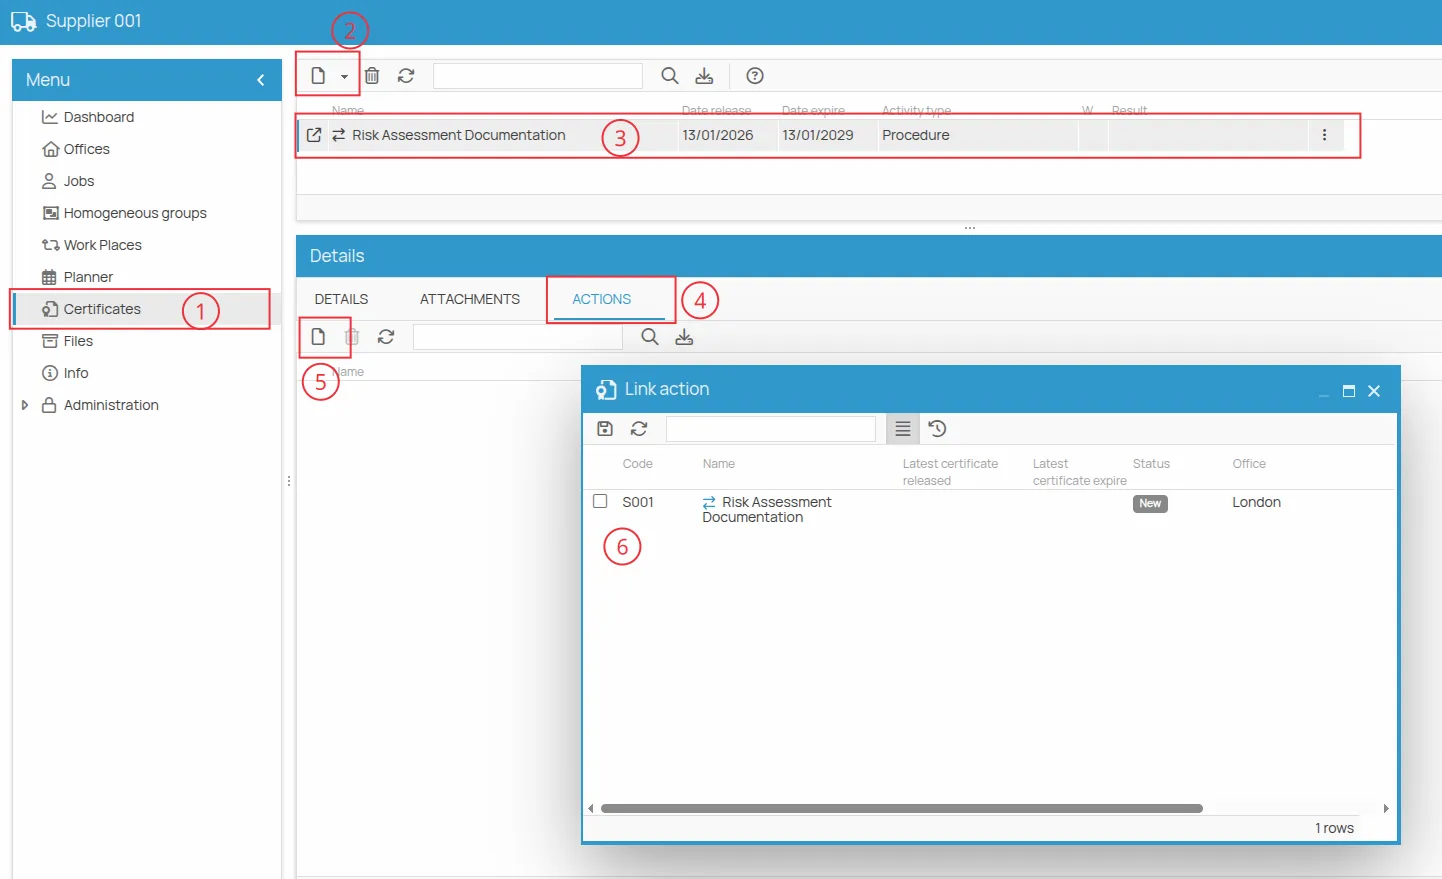
2. Certificate Created from the “Certificates” Menu
Section titled “2. Certificate Created from the “Certificates” Menu”- The supplier creates a new certificate from the Certificates menu;
- They must select the certificate and associate the assigned preventive Action;
- Only at this point is the approval request created.
3. Certificate Without File or Without Association
Section titled “3. Certificate Without File or Without Association”- If the certificate is created from the schedule but the approval submission process is canceled or the required certificate file is not uploaded, the approval request is not completed.
- In this case, the supplier must access the Certificates menu, select the certificate that was created even though the approval request was not sent, link it to the Action, and follow the guided procedure to complete the request.
4. Waiting for Approval
Section titled “4. Waiting for Approval”After saving the certificate, the Action is not considered valid until it has been reviewed by the project manager.
The supplier will receive an automatic notification with the outcome of the approval request.
Notifications and Communications
Section titled “Notifications and Communications”Each phase of the approval workflow is supported by an automatic notification system:
- the Project Manager receives a notification when a new approval request is available;
- the Supplier receives a notification with the outcome of the request (Accepted or Rejected), including any notes.
Setting the Supplier’s Assigned Contact
Section titled “Setting the Supplier’s Assigned Contact”To ensure notifications are received (deadlines, schedules, approval outcomes), it is possible to designate one or more assigned contacts for the supplier. These users will receive the notifications.
To set the assigned contact:
- Access the Info section from the supplier’s main menu;
- Enter the designated user’s email address in the “Assigned Contact” field.
Registering the User
Section titled “Registering the User”If the assigned contact’s email is not yet registered as an active user:
- Go to Administration → Permissions in the main menu.
- Add the user’s email to the Admin or Manager group.
For more information about permission meanings and access levels, see the document Supplier Permissions.
Managing Approval Requests
Section titled “Managing Approval Requests”The Approvals interface allows involved users to view and manage all approval requests sent or received.
The list shows the complete history of steps for each request, ensuring full traceability of the approval process.
Search Filters
Section titled “Search Filters”The search panel includes the following filters:
-
Text search
-
Status: filters requests based on the overall process status:
-
In Progress
-
Completed
-
Step: filters individual phases of the approval process:
-
New
-
Approved
-
Rejected
It is important to distinguish between step and status:
- the step represents a single action within the approval process;
- the status indicates the overall condition of the request.
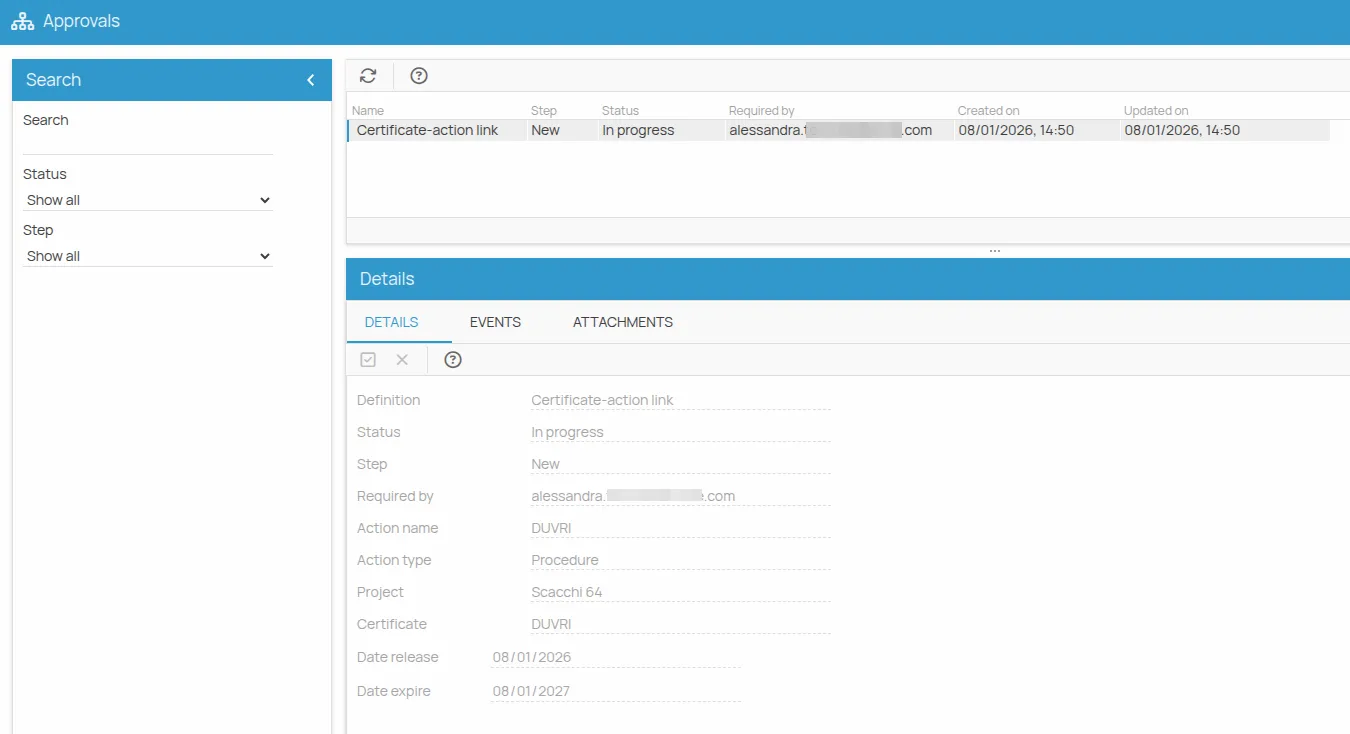
Approval Details
Section titled “Approval Details”Clicking on a row in the list opens the details section, organized into tabs:
-
Details: shows specific information about the approval.
-
Events: lists all executed steps, indicating who performed the action, the type of step, the date, and any notes.
-
Attachments: displays files attached to the approval, such as certificates submitted for validation.
Each approval corresponds to one row in the list.
When created, the initial step is “Creation” and the status is “In Progress”.
At the end of the process, for example after approval, the row shows the step “Approved” and the status “Completed”. All historical details of step changes and attachments are available in the Events tab.
Workflow Example
Section titled “Workflow Example”- The supplier creates an approval request
- a step with status New is generated
- the request is In Progress
- The project manager approves the request
- a new step with status Approved is generated
- the request changes to Completed
In case of rejection, a step with status Rejected is generated.
List Columns
Section titled “List Columns”The approvals list includes the following columns:
| Column | Description |
|---|---|
| Name | Approval name, generally composed of “Approval” + the Action name. |
| Step | Process phase: New, Approved, or Rejected. |
| Status | Overall request status: In Progress or Completed. |
| Requested by | Email address of the user who performed the step (creation, approval, or rejection). |
| Dates | Creation and modification dates of the step. |