Scheduler and Calendar
From the 4HSE interface, you can access the scheduler in two ways: In 4HSE, you can access the scheduler in two ways:
-
directly from the main scheduler icon on the desktop
-
from the office-specific scheduler
The difference between the two is that the desktop scheduler gathers and displays deadlines and scheduled activities from multiple projects and offices. This means that if you are managing multiple companies, you can see an overview of all deadlines and planned actions, and filter to view only those relevant to the company of interest. If you are managing a single project, you can view all deadlines across the offices of that project.
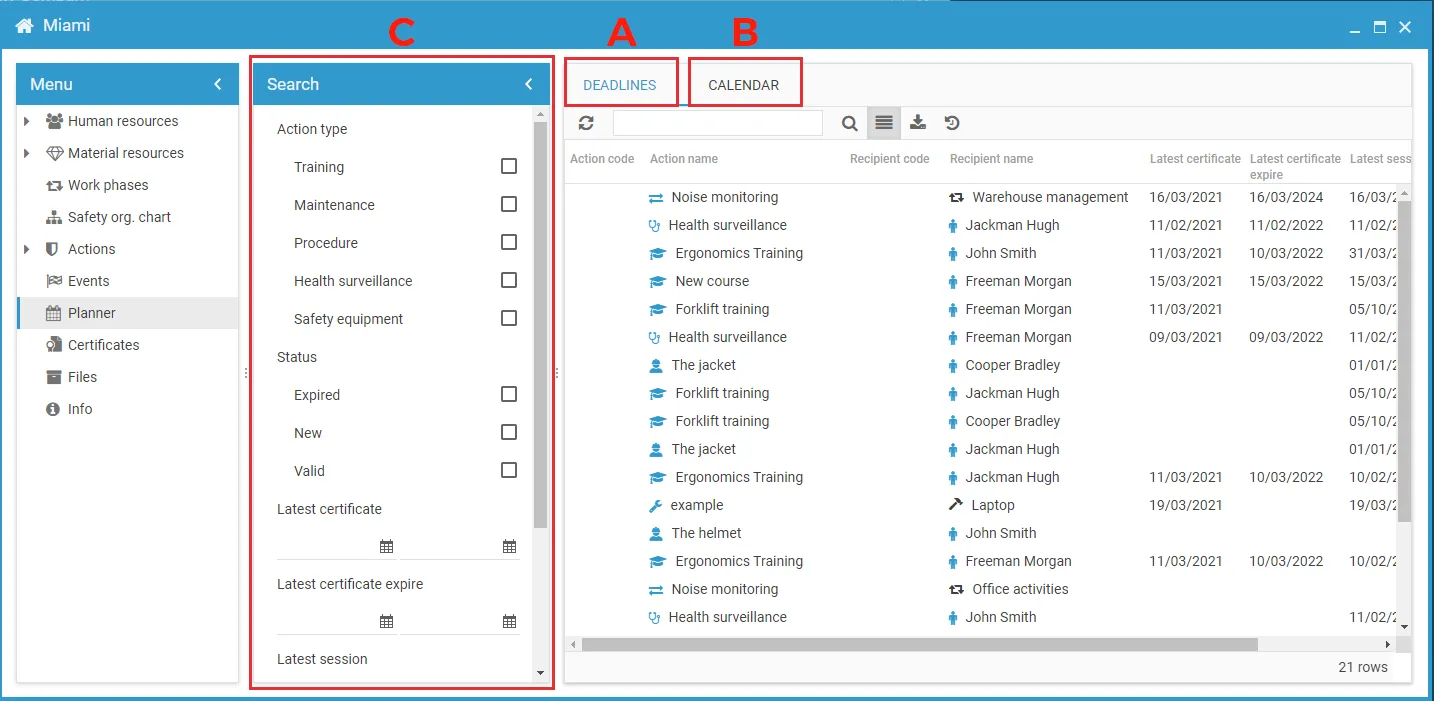
Office Scheduler
Section titled “Office Scheduler”-
Open the project and select the relevant office.
-
Click Scheduler in the left menu. The interface displays a set of filters labeled “Search” on the left side, while the right side is split into two tabs: Deadlines and Calendar.
a) The Deadlines tab shows all activities that are due, as they have been scheduled as part of prevention actions.
b) The tab on the right is the Calendar, which displays when the planned actions should be carried out.
c) The Search filter panel allows you to display only certain types of actions:
- Training
- Maintenance
- Procedures
- Health Surveillance
- Personal Protective Equipment (PPE)
- Documents
You can also filter by action status, regardless of the type:
- Expired
- New
- Valid
Another option is to filter by date range:
- Last session of an action
- Next session
- Expiry date
Or perform a text search by:
- Action name
- Recipient name
All these filters can be combined to refine the search and get the desired result.
Deadlines Tab
Section titled “Deadlines Tab”Each column has a header indicating its content.
The first column contains icons indicating the type of action, followed by the code, the name of the action, and the recipient icon, which may represent:
- a person
- equipment
- an environment
- a substance
Next come the recipient code and name, the date of the last session, the expiry date, and the next scheduled date if applicable.
Finally, the status is displayed:
- Valid: a currently effective prevention action
- Expired: an action that needs to be renewed or is no longer effective
- New: used for resources (human or material) for which no action has yet been performed, but a need has been identified. For example, a new employee enrolled in a training course will remain in “New” status until they are registered in a specific edition.
Calendar Tab
Section titled “Calendar Tab”The Calendar tab displays all scheduled activities. The top toolbar allows you to select the preferred view mode:
- Daily
- Weekly
- Monthly
- Agenda view
Exporting Deadlines and Calendar Views
Section titled “Exporting Deadlines and Calendar Views”Both the calendar and the deadlines list can be exported.
- The calendar exports to an
.icsfile, which can be imported into other time management tools. - The list of deadlines can be exported as a
.csvfile.
Desktop Scheduler
Section titled “Desktop Scheduler”The interface is very similar to the office scheduler. By scrolling through the filter menu on the left, you’ll notice that the main difference is the ability to search across offices and projects.
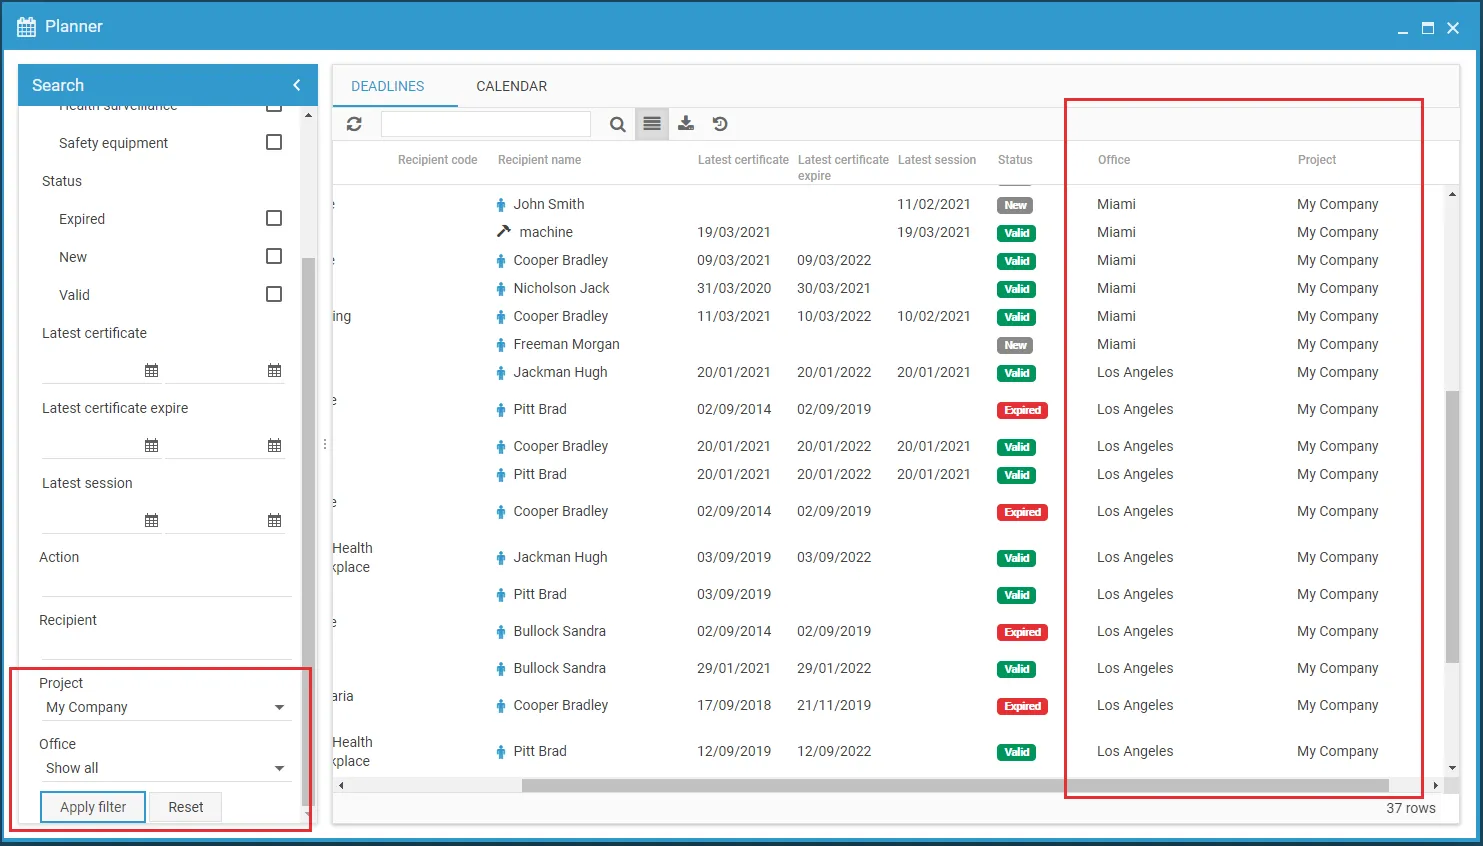
This tool allows you to view upcoming and scheduled activities for all offices (if you have only one project), or deadlines and activities from all projects if managing multiple ones in 4HSE.
As with the office scheduler, all filters can be combined to narrow down results.
The same export options are available, along with all the previously described features.
For planning actions and related deadlines, please refer to the guides on Prevention Actions.