Transferring a Worker Between Offices
It is common in a company for a worker to move from one workplace to another within the same project. Therefore, it becomes necessary to update the worker’s safety status in the new office as well.
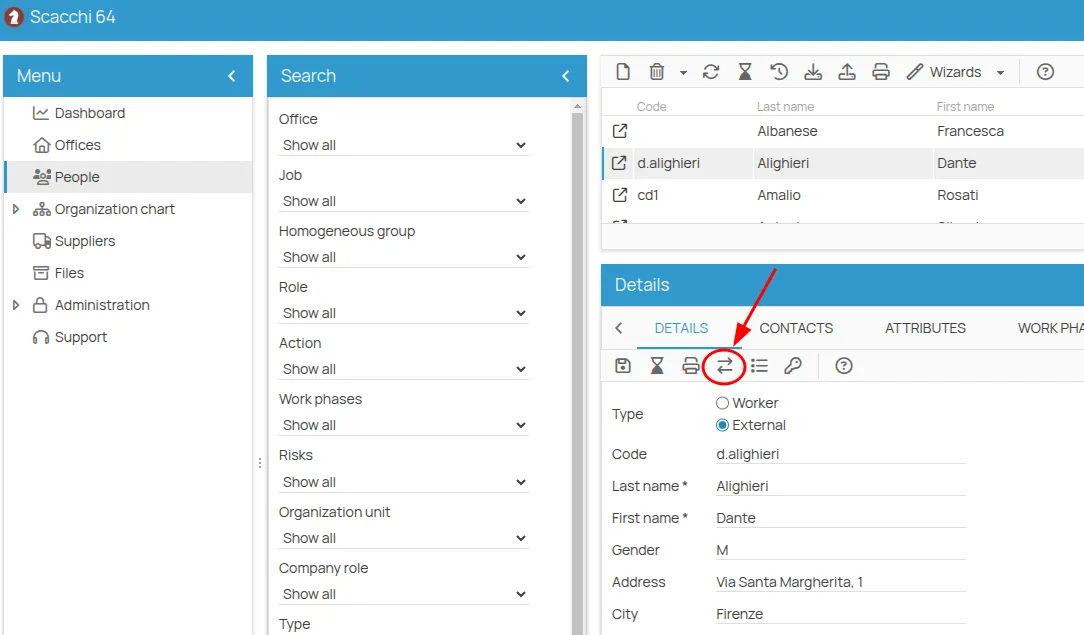
4HSE provides a guided procedure (wizard) to facilitate this process.
You can start the wizard by clicking the dedicated button in the detail toolbar of the project’s personnel section.
How the Wizard Works
Section titled “How the Wizard Works”Step 1: Select Source and Destination Offices
Section titled “Step 1: Select Source and Destination Offices”-
When the tool starts, you’ll see a screen for selecting the source and destination offices.
-
On the left side, you’ll find a list of offices where the person is currently assigned. Select one or more source offices by clicking on them.
-
On the right side, you’ll find a list of available destination offices. Select only one destination office, ensuring it is not among the selected source offices.
-
Click the “Next” button to proceed to Step 2, or “Cancel” to exit the wizard.
Step 2: Enter Transfer Information
Section titled “Step 2: Enter Transfer Information”-
Enter the Transfer Date, which will be the start date at the destination office.
-
Select the option Record end dates in source offices to indicate when the person will stop working at the source offices.
-
If selected, the Transfer Date minus one day will be the end date in the source offices, and the person will no longer be assigned to them.
-
If not selected, the Transfer Date will be used only as the start date in the destination office, with no change to the source office assignments.
- Click “Next” to proceed to Step 3 or “Back” to return to Step 1.
Step 3: Confirm Links and Operations
Section titled “Step 3: Confirm Links and Operations”-
The next screen displays a table with the following columns: Resource Code, Resource Name, Status, and Action Available.
-
The Action Available column is interactive. If the value is Link, you can click it to change the action to None if you do not want to create the link. If the value is already None, it cannot be modified.
-
Carefully review the table to see what already exists in the destination office and which resources can be linked to the person.
-
Click “Confirm” to execute the linking operations and proceed to Step 4, or “Back” to return to Step 2.
Step 4: Perform Operations
Section titled “Step 4: Perform Operations”-
In the final screen, the system will execute the operations listed in Step 3.
-
A progress bar will be shown to provide visual feedback on the status of the linking operations.
-
Wait until the progress bar reaches 100% to ensure the operations are completed successfully.
-
Once complete, the “Finish” button will be enabled.
-
Click the “Finish” button to close the wizard and complete the person’s office transfer.
By following this guide, you will be able to use the transfer tool effectively and accurately. Be sure to double-check the entered information and the planned operations before finalizing the transfer.
Examples
Section titled “Examples”Example 1
Section titled “Example 1”A person is transferred to a destination office with no linked resources
Let’s say:
The person Marco Rossi is currently assigned to the offices Milan and Turin. The destination office is Rome. The transfer date is 2023-07-21. We want to record end dates for the source offices.
Step 1: Select source and destination offices
Section titled “Step 1: Select source and destination offices”Source offices: Milan, Turin Destination office: Rome
Step 2: Enter transfer information
Section titled “Step 2: Enter transfer information”Transfer date: 2023-07-21 Record end dates in source offices: yes
Step 3: Resource table is populated as follows:
Section titled “Step 3: Resource table is populated as follows:”| Resource Code | Resource Name | Status | Action Available |
|---|---|---|---|
| R001 | Safety Training | Present | Link |
| R002 | Health Surveillance | Not present | None |
| R003 | Area A | Not present | None |
| R004 | Equipment XYZ | Not present | None |
Marco Rossi will be unassigned from Milan and Turin as of 2023-07-21.
A link will be created for Marco Rossi to the Safety Training resource in the destination office Rome.
Example 2
Section titled “Example 2”A person is transferred to a destination office with existing resources and history
Let’s say:
The person Anna Verdi is currently assigned to the Florence office. The destination office is Milan. The transfer date is 2023-07-21. We want to record end dates for the source office.
Step 1: Select source and destination offices
Section titled “Step 1: Select source and destination offices”Source office: Florence Destination office: Milan
Step 2: Enter transfer information
Section titled “Step 2: Enter transfer information”Transfer date: 2023-07-21 Record end dates in source offices: yes
Step 3: Resource table is populated as follows:
Section titled “Step 3: Resource table is populated as follows:”| Resource Code | Resource Name | Status | Action Available |
|---|---|---|---|
| R001 | Safety Training | Present | Link |
| R002 | Health Surveillance | Linked | None |
| R003 | Area A | Not present | None |
| R004 | Equipment XYZ | Not present | None |
Anna Verdi will be unassigned from Florence as of 2023-07-21.
A link will be created for Anna Verdi to the Safety Training resource in the destination office Milan.
Note: Anna Verdi already has a work history in Milan, as shown by the Linked status of the Health Surveillance resource. Only new resources will be linked during the transfer process.